Ready to kick your Quickbase skills into high gear?
Quick Base Junkie courses cover Relationships, Formulas, Buttons, HTML, Jinja, APIs, and MORE!
Need Help Optimizing Your Apps?
Let my experts give it a tune-up with a 30-minute app review.
They'll help you identify areas for improvement and provide actionable tips to enhance the user experience. Don't settle for a run-of-the-mill app – schedule your review today.
Need Help Optimizing Your Apps?
Let my experts give it a tune-up with a 30-minute app review.
They'll help you identify areas for improvement and provide actionable tips to enhance the user experience. Don't settle for a run-of-the-mill app – schedule your review today.
Need Help with Your Apps?
Turn your Quickbase Dreams into Reality
with the support of a pre-vetted Expert.
FREE Download:
Query Formula Playbook
FREE Download:
Jinja Date & Time Cheat Sheet for Pipelines
FREE Download:
HTML Cheat Sheet for Forms
FREE Download:
Query Formula Playbook
FREE Download:
Ultimate Grid Edit Guidebook
FREE Download:
The Grid Report Survival Guide
Sales Transactions for Cumulative Chart Demo
DownloadDemystifying the Relationship
Title Section Code:
<div id="relationshipstitle"></div>
Title Custom Javascript:
$('#relationshipstitle').load('product-templates #relationshipstitle');
Body Section Code:
<div id="relationships"></div>
Body Custom Javascript:
$('#relationships').load('product-templates #relationships');
For Checkout pages, the Javascript must be added to the Checkout Footer in the site settings. Also, the full site page url should be used as the root is different. Such as:
<script>
$('#relationships').load('https://www.quickbasejunkie.com/product-templates #relationships');
</script>
Level: Beginner/Intermediate (although Advanced builders may learn a thing or two as well)
Prerequisite: Some (even if minimal) familiarity with Quickbase
Video Length: 3 hrs
Est. Completion Time: 2 days (to allow for practicing & following examples)
You've got a relationship, now what?
Learn how all the pieces fit together to deliver an optimal user experience.
Relationships can be confusing...
Do you struggle with Proxy fields? Conditional dropdowns? Summary fields? Report links? Filtered record pickers? Snapshot fields?
This course will demystify these components and more!
- Understand how records actually relate to one another AND what it means for your forms and user experience.
- Learn what a proxy is, when to use it (and when not to).
- Set up conditional dropdown fields to filter choices.
- Establish snapshot fields to LOCK in values.
- Use report links to filter and display related records in creative AND useful ways.
- See what happens when you change key values that will impact your relationships.
- Discover the effects of deleting a relationship or deleting a table with relationships.
- Get an inside look at how I get creative with relationships using report links, custom key fields, and formulas.

What you'll get:
- Step-by-step videos breaking down the relationship components
- A sample dataset to practice with
- Relationship upgrade lessons that will help you enhance and improve the user experience
- The 1-page relationship blueprint to remind you how the parent/child pieces fit together
- A relationship cheat sheet full of quick steps for easy reference
- PLUS incredible bonuses
- The Relationship Fake-Out
- Instant Relationship
- Formulas as Reference Fields
Important Notes:
This course does not go into detail on the different types of relationships (such as many-to-many, reverse parent/child, or cross-app). Rather it focuses on the foundation of ALL relationships – the one-to-many relationship.
The videos in this course utilize the classic Quickbase interface (pre 2023) which does not include the newer navigation, forms, or dashboards. These new interface features do not impact the central topic of this course and can be "turned off" to facilitate following along if necessary.
Mastering the Text Formula
Title Section Code:
<div id="textformulatitle"></div>
TItle Custom Javascript:
$('#textformulatitle').load('product-templates #textformulatitle');
Body Section Code:
<div id="textformula"></div>
Body Custom Javascript:
$('#textformula').load('product-templates #textformula');
For Checkout pages, the Javascript must be added to the Checkout Footer in the site settings. Also, the full site page url should be used as the root is different. Such as:
<script>
$('#textformula').load('https://www.quickbasejunkie.com/product-templates #textformula');
</script>
Level: Beginner/Intermediate
Prerequisite: Basic understanding of Quickbase
Video Length: 2.75 hrs
Est. Completion Time: 1.5 days (to allow for practicing & following examples)
THE MOST comprehensive course on Quickbase text formulas.
Learn to confidently use text functions that:
- Extract characters from a text string leaving just the part that you need (Functions such as: Left, Right, Mid, NotLeft, NotRight, and Part)
- Combine text from fields or text strings to produce lists, summaries, and more (Function and operators such as: "&", List, and Split)
- Modify and manipulate text to get it into the format you need (Functions such as: SearchAndReplace, PadLeft, PadRight, Upper, Lower, ToText, and ToFormattedText)
- Evaluate the contents of a text field against specific conditions to arrive at a true/false result (Functions and operators such as: "=", "!=", "<>", Contains, Begins, Ends, IsNull, true, false, and not)
But wait, there's MORE!
- Use logic to determine if a specific criteria is met AND return a specific result depending on if the criteria was or was not met (Functions and operators such as: Case, If, Min, Max, And, and Or)
- Learn methods and strategies to combine functions to produce incredible results!
- Get tips & shortcuts to help you build, organize, and troubleshoot your formulas.

What you'll get:
- Step-by-step videos breaking down 30+ text formula functions
- Multiple use case videos demonstrating how to combine text functions and leverage them in your apps
- Bonus videos with more text formula uses that extend the functions beyond basic fields
- A cheat sheet file of all the text formulas for easy reference
- Swipe files of the exact formulas used in each of the use cases and bonus videos that you can copy from anytime
- 12 formula shortcuts to help you manage your formulas
- A behind the scenes look at my Formula Lab app
Important Notes:
This course does not include the use of Rich Text formula fields or how to use HTML in formulas. For that, I recommend the HTML Formula Crash Course.
The videos in this course utilize the classic Quickbase interface (pre 2023) which does not include the newer navigation, forms, or dashboards. These new interface features do not impact the central topic of this course and can be "turned off" to facilitate following along if necessary.
HTML Formula Crash Course
Title Section Code:
<div id="htmlformulatitle"></div>
Title Custom Javascript:
$('#htmlformulatitle').load('product-templates #htmlformulatitle');
Body Section Code:
<div id="htmlformula"></div>
Body Custom Javascript:
$('#htmlformula').load('product-templates #htmlformula');
For Checkout pages, the Javascript must be added to the Checkout Footer in the site settings. Also, the full site page url should be used as the root is different. Such as:
<script>
$('#htmlformula').load('https://www.quickbasejunkie.com/product-templates #htmlformula');
</script>
Level: Intermediate/Advanced
Prerequisite: Some Quickbase formula writing experience (even if minimal)
Video Length: 5 hrs
Est. Completion Time: 2 - 3 days (to allow for practicing & following examples)
If you're not using HTML formulas in your apps you're seriously missing out!
This course will help you take your apps from ho-hum to holy-cow!
What you can do with HTML Formulas:
- Combine formula functions with HTML to dynamically deliver eye-catching information.
- Enhance text and numbers by setting the color, background, boldness, font, and MUCH more.
- Add images to reports and forms to display products, logos, or other graphics.
- Incorporate icons that automatically update when field values change.
- Create numbered or bulleted lists of information including summaries from child tables.
- Add dynamic hyperlinks and buttons where you control the look, label, and behavior.
- Use HTML tables to organize information and create print perfect forms (great for invoices, purchase orders, welcome letters, and more!).
- Build the MOST incredible Kanban reports you've ever seen.
But that's not all!
- Learn my hack for developing large amounts of HTML with minimal effort.
- See how HTML can be used in report formulas, extending the use beyond basic fields
- Get tips & shortcuts to help you build, organize, and troubleshoot your formulas.

What you'll get:
- Step-by-step videos gradually building from basic to advanced
- A practice packet that allows you to replicate the EXACT formulas I teach
- Dozens of examples showing the versatility and value of HTML formulas
- HTML/CSS formula cheat sheets & swipe files for easy reference and copy/paste
- PLUS BONUS HTML DEMOS:
- Custom KPIs
- Print Perfect Forms
- Kanban Cards (3 ways!)
Important Notes:
The focus of this course is on HTML (and CSS) and how to use it in the Rich Text Formula field. In numerous examples, I will use a variety of formula functions. However, it is not the intent of this course to explain those functions in great detail. For that, I recommend the course Mastering the Text Formula.
The videos in this course utilize the classic Quickbase interface (pre 2023) which does not include the newer navigation, forms, or dashboards. These new interface features do not impact the central topic of this course and can be "turned off" to facilitate following along if necessary.
Intro to Jinja for Pipelines
Title Section Code:
<div id="jinjatitle"></div>
TItle Custom Javascript:
$('#jinjatitle').load('product-templates #jinjatitle');
Body Section Code:
<div id="jinja"></div>
Body Custom Javascript:
$('#jinja').load('product-templates #jinja');
For Checkout pages, the Javascript must be added to the Checkout Footer in the site settings. Also, the full site page url should be used as the root is different. Such as:
<script>
$('#jinja').load('https://www.quickbasejunkie.com/product-templates #jinja');
</script>
Level: Intermediate/Advanced
Prerequisite: Some Pipeline experience
Video Length: 1.75 hrs
Est. Completion Time: 1.5 days (to allow for practicing & following examples)
Jinja is the language used to write formulas and transform data within a Pipeline.
Do you know how to use it?
Intro to Jinja for Pipelines introduces Jinja for Pipelines in a simple to understand way.
With Jinja, you can stop creating extra fields just to produce a result to be used in a Pipeline.
This course includes multiple demos plus the 13-page Quick Base Junkie Jinja Library with over 50 Jinja functions with examples.
With Jinja you can:
- Perform math by adding, subtracting, dividing, or multiplying values.
- Manipulate text by extracting the part you need or combining it with other fields or text strings.
- Modify text through the use of functions like replace, capitalize, and format.
- Create boolean expressions that result in true or false for use in queries and conditional branches.
- Mimic Quickbase functions like "Case" and "If" to create conditionalized results.
- Wrangle pesky date/time fields using time zone, time delta, and other time-based functions.
- Aggregate values from a search/query step creating counts, sums, and lists. THIS IS A HUGE ADVANTAGE TO USING JINJA
But that's not all!
- You can also set your own variables right in the Pipeline
- Clear values in your fields
- Add notes to your Pipeline steps
- Set default values when results are null

What you'll get:
- Video intro to what Jinja is and how to use it in Pipelines.
- Multiple demonstrations using and combining Jinja functions.
- A practice use case for you to follow along using an app from the Quickbase App Exchange.
- 50+ functions described with examples in the Quick Base Junkie Jinja Library (PDF) that you can directly copy/paste from.
- Jinja FAQs to answer your burning "getting started" questions.
- Troubleshooting guide to assist when errors or unexpected results occur.
- Links to additional Jinja resources.
Important Notes:
This course and its materials are not intended to teach you how to use Pipelines. Anyone using Jinja to enhance their Pipelines should first understand how to properly use Pipelines to mitigate adverse results.
The videos in this course utilize the classic Quickbase interface (pre 2023) which does not include the newer navigation, forms, or dashboards. These new interface features do not impact the central topic of this course and can be "turned off" to facilitate following along if necessary.
The Power of Rich Text Buttons
Title Section Code:
<div id="richtextbuttonstitle"></div>
TItle Custom Javascript:
$('#richtextbuttonstitle').load('product-templates #richtextbuttonstitle');
Body Section Code:
<div id="richtextbuttons"></div>
Body Custom Javascript:
$('#richtextbuttons').load('product-templates #richtextbuttons');
For Checkout pages, the Javascript must be added to the Checkout Footer in the site settings. Also, the full site page url should be used as the root is different. Such as:
<script>
$('#richtextbuttons').load('https://www.quickbasejunkie.com/product-templates #richtextbuttons');
</script>
NOTICE: This course was recently updated. After purchase, you will get access to the 'new' version of this button course, which includes many new lessons, examples, and a button starter tool (not yet reflected in the text below).
Level: Intermediate
Prerequisite: Some Quickbase formula writing experience (even if minimal)
Video Length: 1.5 hrs
Est. Completion Time: 1 day (to allow for practicing & following examples)
Ever wonder how every other app seems to have colorful, engaging, and dynamic buttons?
Feeling a bit of FOMO?
Never fear, custom buttons are completely possible in Quickbase using the power of the rich text formula field!
What you can do with Rich Text Buttons:
- Create more engaging apps by drawing focus to your action buttons.
- Define your own button style down to the very last detail matching your company or app's branding.
- Use pre-existing styles (called "classes") to shortcut the work. Including 'bootstrap' classes few people know can be used in Quickbase!
- Incorporate an image as the button's graphic adding more visual impact and customization.
But wait, with the power of the formula, we can do even more!
- Dynamically change the button attributes (url, color, label, shape, image, etc) based on information in the record.
- Save your custom button style as an app variable to be used across the app in every table.
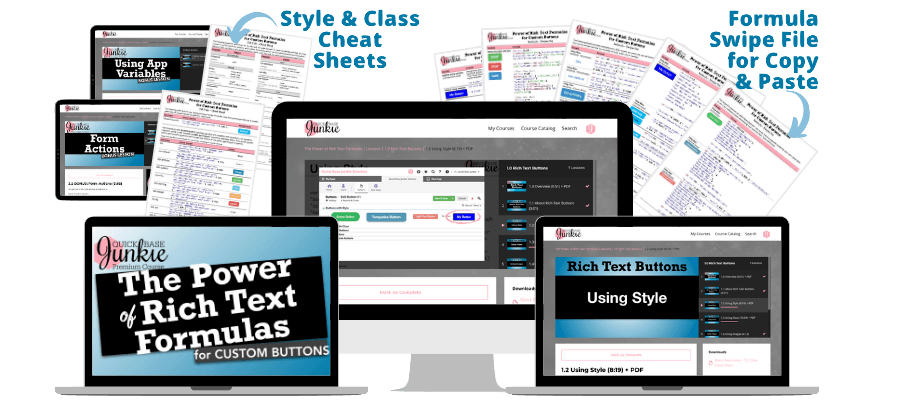
What you'll get:
- Instruction that breaks down 3 different methods to create custom buttons
- An easy to follow structure that makes learning the necessary HTML & CSS feel simple
- A detailed example of a custom button in use, where one button performs 3 different tasks
- Swipe files of all the demonstrated formulas that you can copy & paste
- Style Cheat Sheet containing all of the style properties and examples
- Class Cheat Sheet containing all of the class names and examples
Important Notes:
This course will be updated in the Fall of 2021 to include many new capabilities released by Quickbase in 2021 relating to rich text buttons. All individuals who own this course at the time the update is released will automatically get access.
This course goes into detail on the HTML and formula components used in custom buttons. However, it is not intended to teach HTML formulas in general (for that, see the HTML Formula Crash Course which only includes brief instruction on custom buttons).
This course does not go into detail on constructing the function or destination of the rich text button, although some examples are included. For more information on button functions, see the Action Button Toolbox and the Secrets of API Buttons course.
Some examples in this course include small Javascript functions that Quickbase no longer supports.
Super Fast HTML Formula Converter Tool
Title Section Code:
<div id="htmlconvertertitle"></div>
TItle Custom Javascript:
$('#htmlconvertertitle').load('product-templates #htmlconvertertitle');
Body Section Code:
<div id="htmlconverter"></div>
Body Custom Javascript:
$('#htmlconverter').load('product-templates #htmlconverter');
For Checkout pages, the Javascript must be added to the Checkout Footer in the site settings. Also, the full site page url should be used as the root is different. Such as:
<script>
$('#htmlconverter').load('https://www.quickbasejunkie.com/product-templates #htmlconverter');
</script>
Tool Purpose: Convert raw HTML into formula friendly text strings
Recommended for: Anyone using a moderate amount of HTML (or more) in rich text formulas
Paste, Click, DONE!
Instantly convert any block of HTML text into a Rich Text Formula friendly text string.
STOP endlessly typing double quotes to create text strings and escaping or replacing the internal quotes.
The Super Fast HTML Formula Converter does the work for you and retains all line formatting, which means WAY less time and no ugly unmanageable blobs of text.
And if you include bracketed text references in your HTML, they'll automatically sync up when you paste the output into your Rich Text formula field! Amazing!
I CANNOT believe I ever lived without this tool. It has made my development so much FASTER and way LESS FRUSTRATING. Literally, every time I use it, I'm amazed at how well it works... I kick myself for not making it sooner.
With the Super Fast HTML Formula Converter you can:
- Save tons of time by eliminating the tedious task of manually converting HTML into the correct formula format
- Choose your preferred quoting method by using the default single quote or force the use of escaped double-quotes (HTML containing URLs will automatically use double-quotes)
- Enter field references right into your HTML and have them automatically sync up in the converted formula friendly text
- Enter placeholders in your HTML that can easily be replaced with variables and other formula functions when editing the converted HTML formula — without needing to do any additional converting
- Retain the HTML line formatting for neat and organized formulas (that are way easier to modify later)

What you'll get:
- The converter tool which can be accessed online, anytime through your Quick Base Junkie account
- Video instruction for using the converter
- Written instruction for using the converter
- A demonstration that includes how to generate your own HTML
- An example use case with a few extra tips
Important Notes:
This is an HTML converter tool ONLY. While it includes a brief example of how to generate HTML, it is not a course on how to create, customize, or understand HTML. For that, I recommend the HTML Formula Crash Course.
The demo in this tool utilizes legacy Quickbase forms (pre 2023) which are still available, but not the default form option. The tool itself does not require the use of legacy forms.
Secrets of API Buttons
Title Section Code:
<div id="apibuttonstitle"></div>
TItle Custom Javascript:
$('#apibuttonstitle').load('product-templates #apibuttonstitle');
Body Section Code:
<div id="apibuttons"></div>
Body Custom Javascript:
$('#apibuttons').load('product-templates #apibuttons');
For Checkout pages, the Javascript must be added to the Checkout Footer in the site settings. Also, the full site page url should be used as the root is different. Such as:
<script>
$('#apibuttons').load('https://www.quickbasejunkie.com/product-templates #apibuttons');
</script>
Level: Intermediate/Advanced
Prerequisite: Some Quickbase formula writing experience (even if minimal)
Video Length: 4.5 hrs
Est. Completion Time: 2-4 days (to allow for practicing & following examples)
When an API button is pressed, something incredible happens...
A mini-program runs adding, editing, copying, or deleting records based on your custom specifications.
These mini-programs can include multiple actions across multiple records in multiple tables or apps.
All in that single button click.
And unlike Automations, Webhooks, or even Pipelines, API buttons are under the control of the user. They choose when to trigger the mini-program through the click of the button.
So, what can you do with API buttons?
- Add new records (requiring the user to save the new record or not)
- Copy an existing record while requiring the user to save the new record
- Edit existing records without requiring the user to save the changes
- Delete records without requiring confirmation from the user
- Trigger email notifications
- Trigger Pipelines
- Trigger Webhooks
But that's not all! With API buttons you can also:
- Control the user's destination after the above action (or as the primary action) — directing them to a homepage, thank you page, record, table homepage, report, etc.
- Combine or repeat any of the above actions to create multi-action buttons
- Utilize the power of formula functions to further enhance and expand the button's functionality
Here are just a few examples of what can be done with API Buttons:
- Initiate an email to request an approval
- Log an approval (or disapproval) from an email
- Add a set of standard tasks to a project
- Consolidate repetitive tasks by pre-populating new records with a set of field values
- Create a counter that increments with each button press (logging the number of times an action was taken)
- Update multiple fields at one time (such as phase, status, date, notes, etc.)
- Copy a template record to cut down on data entry (and mistakes)
- Delete the last item added to an order

What you'll get:
- Everything you need to use the 5 most common QuickBase APIs in your applications
– API_AddRecord
– API_GenAddRecordForm
– GenCopyRecord
– API_EditRecord
– API_DeleteRecord - Instruction that breaks down 24 different URL formula components that make the magic of the API possible
- An easy to remember 4 part structure that will help you create your API formulas with ease
- Multiple use cases and examples that include end-to-end demonstrations covering the business scenario, application setup, formula writing, and implementation in Quickbase — providing inspiration and integration of the lessons.
- Swipe files of all the demonstrated formulas that you can copy & paste
- Cheat sheets for all the formula components covered for quick reference after taking the course
- A decoder for all the field format requirements when using APIs so that you don't have to spend the time figuring them out on your own
- A troubleshooting guide to help you out when your formulas have errors
- Bonus lessons that help take your new API button skills to the next level
Important Notes:
The buttons in this course are constructed using the URL Formula field type. It is also possible to build buttons using the Rich Text Formula field, but that requires the use of some HTML which is not included in this course. For information on the HTML portion of a Rich Text Formula button, see The Button Masterclass course (which does not cover APIs).
Throughout this course, I use a variety of formula functions to enhance the functionality of the API button's action. I explain these functions in the context of the demonstration. However, this course is not intended to teach these functions in the broader context. For those functions specifically related to text formulas (which most are), I suggest the course Mastering the Text Formula.
This course covers the 5 APIs listed above and their use in the context of a formula button. Other Quickbase APIs and their uses are not included in this course.
The videos in this course utilize the classic Quickbase interface (pre 2023) which does not include the newer navigation, forms, or dashboards. These new interface features do not impact the central topic of this course and can be "turned off" to facilitate following along if necessary.
Cracking the Webhook Code
Title Section Code:
<div id="webhooktitle"></div>
TItle Custom Javascript:
$('#webhooktitle').load('product-templates #webhooktitle');
Body Section Code:
<div id="webhook"></div>
Body Custom Javascript:
$('#webhook').load('product-templates #webhook');
For Checkout pages, the Javascript must be added to the Checkout Footer in the site settings. Also, the full site page url should be used as the root is different. Such as:
<script>
$('#webhook').load('https://www.quickbasejunkie.com/product-templates #webhook');
</script>
Level: Intermediate/Advanced
Prerequisite: None (some code writing experience beneficial)
Video Length: 1.5 hrs
Est. Completion Time: 1 - 2 days (to allow for practicing & following examples)
Webhooks allow you to send data from one source to another using a unique URL — opening up a whole world of possible integrations.
But, understanding how to "package" the data and construct the URL can be challenging.
With webhooks you can...
- Do things that are covered in this course, such as:
- Send a message to a Slack channel (Slack is a team communication app)
- Consolidate notifications on bulk record changes into a single new record in QuickBase
- Do many more things that are not specifically covered in this course, such as:
- Send project updates to a Microsoft Teams channel
- Post a chat to a Ring Central team message
- Send an alert to the IBM Alert Notification Service
- Update your CRM with events in MailChimp
- Add an incident to ServiceNow
Basically, with webhooks you can:
- Send information from Quickbase to other locations in Quickbase
- Send information from Quickbase to outside applications that have incoming webhook capabilities (search the app's developer documentation to find out)
Quickbase also makes it easy with these webhook helpers!
- Triggers that are similar to email notifications to set when the webhook is sent (when a record is added, updated, or deleted and meets certain criteria or certain fields are modified)
- Shortcuts to refer to various parts and attributes of the Quickbase record, app, or table triggering the webhook
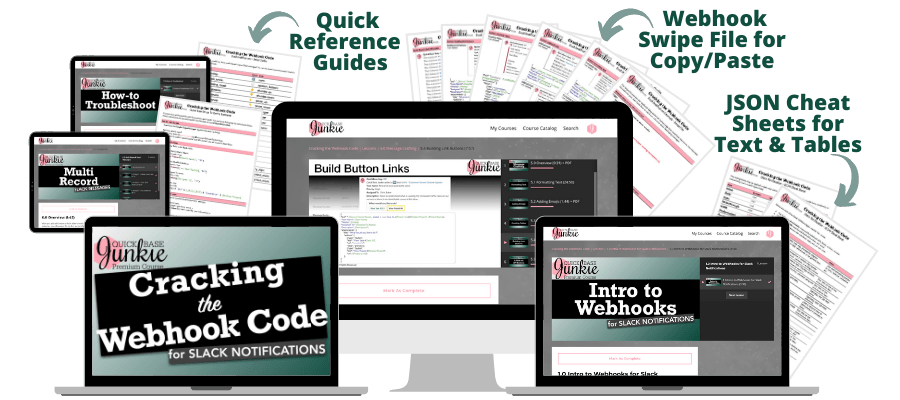
What you'll get:
- Detailed instruction on the Quickbase and Slack Setup
- Instruction that breaks down the JSON code for the Slack message body – including multiple text styles, buttons, links, tables, and emojis
- A Quickbase to Quickbase example that uses XML code to consolidate bulk changes into a single record
- Step-by-step videos for including field references and webhook markers
- Tips on using User field references & parent record links in your webhook code
- Option to follow along using an app from the app Exchange and a free Slack account
- Swipe file of all the webhook code that you can copy & paste
- Cheat sheet of all the Slack JSON fields and text formatting options
- Quick reference for the emoji codes shared in the course 😀
Important Notes:
This course teaches webhooks in the context of sending Quickbase information to a Slack channel as a message. Webhooks can be used for MANY more purposes and with many other applications. It's important to refer to the application's developer documentation on webhooks to understand the app's specific requirements and format.
The Button Masterclass
Title Section Code:
<div id="buttonmasterclasstitle"></div>
TItle Custom Javascript:
$('#buttonmasterclasstitle').load('product-templates #buttonmasterclasstitle');
Body Section Code:
<div id="buttonmasterclass"></div>
Body Custom Javascript:
$('#buttonmasterclass').load('product-templates #buttonmasterclass');
For Checkout pages, the Javascript must be added to the Checkout Footer in the site settings. Also, the full site page url should be used as the root is different. Such as:
<script>
$('#buttonmasterclass').load('https://www.quickbasejunkie.com/product-templates #buttonmasterclass');
</script>
Level: Intermediate
Prerequisite: Some Quickbase formula writing experience (even if minimal)
Video Length: 2.5 hrs
Est. Completion Time: 2 days (to allow for practicing & following examples)
Buttons are an invaluable asset to any workflow.
Are you leveraging their potential?
Use them in your workflows to:
- Navigate to a custom Thank You page when a record is saved
- Perform quick-actions like "Save & Home"
- Add a child record in a pop-up window (vs the standard new screen)
- "Save & Keep Working" mid form
- Show a record's notes in a pop-up without navigating away from a report
- PLUS many others
This course will provide you with the skills, tools, and inspiration to transform your apps (and the workflow) with custom rich text buttons.
Are you ready to...
- Create attention-grabbing navigational or action-oriented buttons.
- Control the appearance of your button using a completely custom style, a pre-defined style, or an image.
- Control the behavior of your button such as where or how it opens or if the current record is saved before opening.
- Control the destination or action through a variety of Quickbase URL commands and button options like Replace RID.
- Use formula functions to dynamically modify the button's appearance or behavior based on record data.
But wait, you can do even more!
- Create hover-over text 'pop-ups'
- Add 'single use' report buttons
- Include icons & text on a button
- Incorporate rich-text & code pages for enhanced workflows

What you'll get with this course:
- Instruction that breaks down:
- 3 different methods Style
Class
Images to control the appearance of your buttons - 4 different methods Target
OpenAsPopup
SaveBeforeNavigating
ReplaceRID to control the behavior of your buttons - How buttons appear & behave on mobile (+ a brief look at buttons in email)
- 3 different methods Style
- 6 detailed examples Print Record
View/Edit Child Record
Show Notes From Report
Save & Home
Save & New
Save & Thank You
+ Additional Resources demonstrated from start to finish in an app that you can get from the AppExchange - 4 bonus lessons Show Info with Hover Over
Button with Icon & Text
Update Record from Report
Add Children in Pop-up to further elevate the core concepts taught in the course - A SUPER valuable Button Starter Tool that generates the initial button formula for you
- Multiple Quizzes to help lock in the lessons
- Troubleshooting tips to help you identify the cause of issues
- Answers to frequently asked questions
- Swipe files of all the demonstrated formulas that you can copy & paste
- Style Cheat Sheet containing all of the style properties and examples
- Class Cheat Sheet containing all of the class names and examples
Important Notes:
This course goes into detail on the HTML and formula components used in custom buttons. However, it is not intended to teach HTML formulas in general (for that, see the HTML Formula Crash Course which only includes brief instruction on custom buttons).
This course does not go into detail on constructing the function or destination of the rich text button, although many examples are included. For more information on button functions, see the Action Button Toolbox and the Secrets of API Buttons course.
The videos in this course utilize the classic Quickbase interface (pre 2023) which does not include the newer navigation, forms, or dashboards. These new interface features do not impact the central topic of this course and can be "turned off" to facilitate following along if necessary.